How Guards Work in NestJS for Authentication and Authorization
Now that your NestJS app can validate incoming data, the next important question is:
Should this request even be allowed to continue?
Because clean input is great.
But if an unauthenticated user can still hit your protected route, your API is basically saying:
“Thanks for formatting the request nicely. Please enjoy this unauthorized data.”
Not ideal.
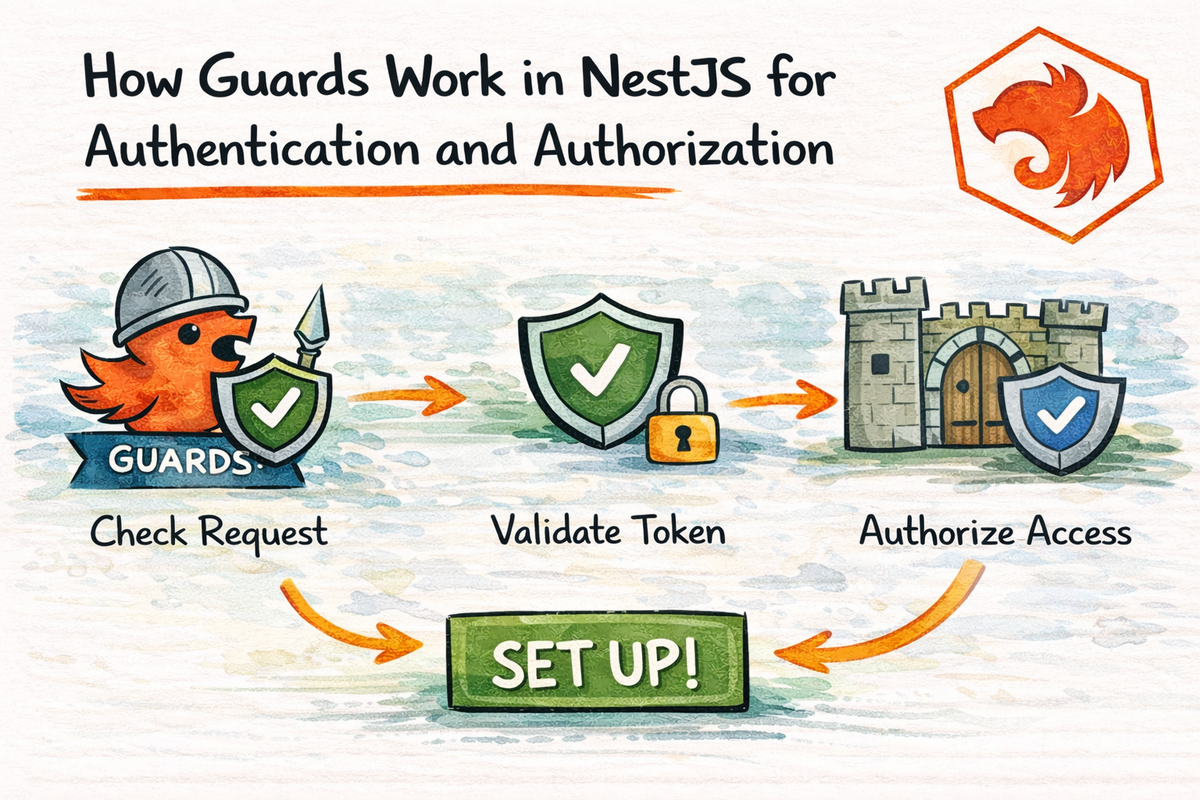
This is where guards come in.
Guards are one of the most important parts of NestJS security. Nest’s official docs define a guard as a class annotated with @Injectable() that implements the CanActivate interface, and they describe its single responsibility as deciding whether a request will be handled by the route handler or not.
In this article, we will make guards simple.
By the end, you will understand:
- what a guard is
- how it fits into the request lifecycle
- the difference between authentication and authorization
- why guards are better than middleware for route access rules
- how JWT-protected routes usually work in NestJS
- what beginners often get wrong
Let’s get into the part of your app that decides who gets in.
What Is a Guard in NestJS?
A guard in NestJS is a class that decides whether a request is allowed to reach a route handler. Nest’s docs define this as the core purpose of guards, and they say guards commonly enforce runtime conditions such as permissions, roles, or ACL-style access checks.
So the simple version is:
a guard answers the question: “Can this request continue?”
If the answer is yes, the request moves on.
If the answer is no, the route handler never runs.
That makes guards perfect for:
- authentication
- authorization
- role checks
- permission checks
- protected routes
Guards are not about shaping data.
They are not about formatting responses.
They are not about business logic.
They are about access control.
Very focused. Very useful.
Where Guards Fit in the NestJS Request Lifecycle
Nest’s request lifecycle docs place guards after middleware and before interceptors, pipes, and the controller route handler.
So the rough flow is:
- middleware
- guards
- interceptors
- pipes
- controller
That means guards step in before your controller logic runs.
Which is exactly what you want for access control.
Because if a request should not be allowed, it is better to stop it early than let it travel deeper into your app.
That is one reason guards feel so natural in NestJS.
Authentication vs Authorization
These two terms get mixed up constantly, so let’s clean that up.
Nest’s security docs describe authentication as confirming who the user is, while authorization is about determining what that authenticated user is allowed to do. Nest also says authorization is independent from, but requires, authentication.
Authentication
Authentication answers:
Who are you?
Examples:
- Is this JWT valid?
- Is this user logged in?
- Does this bearer token belong to a real session or user?
Authorization
Authorization answers:
What are you allowed to do?
Examples:
- Can this user access the admin route?
- Can this user delete this resource?
- Does this user have the required role?
A nice way to remember it:
- Authentication = prove identity
- Authorization = check permission
That distinction matters a lot when designing guards.
Why Guards Are Better Than Middleware for Authorization
This is one of the most important NestJS ideas in this chapter.
Nest’s guards docs explicitly explain that middleware is often fine for authentication-related tasks like validating a token or attaching data to the request, but middleware is “dumb” in the sense that it does not know which handler will run next. Guards, on the other hand, have access to the ExecutionContext, so they know exactly what will execute next. That is why Nest positions guards as the right place for authorization logic.
That means:
Middleware is okay for
- generic request preprocessing
- attaching request metadata
- low-level token parsing
- broad logging
Guards are better for
- route-specific protection
- auth checks based on handler metadata
- role-based access control
- permission-based decisions
So yes, middleware and guards can both “look at the request.”
But guards know more about the route context, and that makes them the better fit for access control.
This is a really important distinction.
What Does CanActivate Mean?
Nest guards implement the CanActivate interface. The official docs describe a guard as a class implementing CanActivate, and its main job is to return whether the current request should proceed. :contentReference[oaicite:7]{index=7}
A very basic custom guard looks like this:
import { CanActivate, ExecutionContext, Injectable } from '@nestjs/common';

@Injectable()
export class SimpleAuthGuard implements CanActivate {
  canActivate(context: ExecutionContext): boolean {
    return true;
  }
}
This does not protect anything yet.
But it shows the core shape.
The important part is canActivate().
That method decides whether the request may continue.
If it returns:
true→ request continuesfalse→ request is blocked
That is the heart of guard behavior.
A Very Simple Custom Guard Example
Let’s build a beginner-friendly example.
import { CanActivate, ExecutionContext, Injectable } from '@nestjs/common';

@Injectable()
export class HeaderGuard implements CanActivate {
  canActivate(context: ExecutionContext): boolean {
    const request = context.switchToHttp().getRequest();
    return request.headers['x-api-key'] === 'my-secret-key';
  }
}
Then use it like this:
import { Controller, Get, UseGuards } from '@nestjs/common';
import { HeaderGuard } from './header.guard';

@Controller('admin')
export class AdminController {
  @Get()
  @UseGuards(HeaderGuard)
  getAdminData() {
    return { message: 'Protected admin data' };
  }
}
What happens here?
- the request comes in
- the guard checks
x-api-key - if the value matches, the route runs
- if not, access is denied
This is obviously not a production auth strategy.
But it is a very good “first guard” example because the logic is easy to see.
What Is ExecutionContext and Why Does It Matter?
Nest’s execution context docs explain that ExecutionContext provides details about the current execution environment and is specifically useful for building guards, filters, and interceptors that work across application contexts. The guards docs also emphasize that guards can inspect what is about to run next.
In normal HTTP routes, this is how you typically use it:
const request = context.switchToHttp().getRequest();That gives you access to the request object, including things like:
- headers
- params
- body
- user
- cookies
- other attached metadata
This is a big reason guards are so useful.
They can inspect both the request and the route context before deciding whether to allow access.
Applying Guards in NestJS
Nest lets you apply guards at different levels using @UseGuards(). The docs show guards being bound declaratively this way, which is part of Nest’s overall design style for interposing logic at the right point in the request/response cycle.
You can attach guards to:
- a single route
- an entire controller
- globally across the whole app
Route-level guard
@UseGuards(AuthGuard)
@Get('profile')
getProfile() {
  return { message: 'Protected route' };
}
Controller-level guard
@UseGuards(AuthGuard)
@Controller('admin')
export class AdminController {}
The idea is simple:
- route-level = protect one endpoint
- controller-level = protect a whole group of endpoints
- global = protect broad app areas, depending on setup
This flexibility is very useful once your app grows.
How JWT Authentication Usually Works in NestJS
Nest’s authentication docs still present the standard JWT flow like this:
- the client authenticates with username and password,
- the server issues a JWT,
- the client sends that JWT back as a bearer token in the
Authorizationheader on later requests, - protected routes check whether the token is valid.
That means in practical terms:
Login phase
The user sends credentials to something like:
POST /auth/loginIf valid, the server returns a JWT.
Protected route phase
The client sends:
Authorization: Bearer <token>to protected endpoints.
Guard phase
A guard checks the token and decides whether the request should continue.
That is the typical shape of JWT auth in NestJS.
It is one of the most common real-world guard use cases.
The Role of AuthGuard in NestJS
Nest’s Passport recipe explains that when you use the built-in AuthGuard from a Passport strategy, the route handler will only run if the user has been validated, and the request object will be populated with a user property during that flow.
So conceptually, an auth guard often does this:
- reads the token or credentials
- validates them
- attaches the authenticated user to the request
- allows the route handler to continue
That means your controller can then use req.user or a custom decorator like @User() later.
Very clean.
The controller does not have to manually parse the token and validate everything every time.
That is exactly the kind of separation NestJS is good at.
Authentication Guards vs Authorization Guards
It helps to think of these as two related but different categories.
Authentication guard
Checks identity.
Examples:
- Is the JWT valid?
- Is the user logged in?
- Does the request contain a valid bearer token?
Authorization guard
Checks permission after identity is known.
Examples:
- Is this user an admin?
- Does this user have the
editorrole? - Is this user allowed to access this feature?
Nest’s authorization docs describe authorization as the process that determines what a user is able to do, while authentication provides the identity foundation required first.
So the usual order is:
- authenticate user
- authorize user
That is the safer and more logical flow.
A Simple Roles Guard Mental Model
Even if you do not build a full roles guard yet, this is the right way to think about it.
A roles guard usually asks:
- what role is required for this route?
- what role does the current user have?
- do they match?
Because guards have access to execution context and can be paired with route metadata, they are the natural place for role-based protection. That is exactly the kind of runtime condition Nest’s guards docs point to when describing permissions and ACL-style checks.
That is why “admin-only route” logic belongs in guards much more naturally than in controllers.
Controllers should not be in the business of deciding all route permissions manually.
That gets messy quickly.
Why Guards Keep Controllers Cleaner
Without guards, you might be tempted to do things like this inside a controller:
if (!request.user) {
  throw new UnauthorizedException();
}

if (request.user.role !== 'admin') {
  throw new ForbiddenException();
}
That works.
But it is not a great pattern if you repeat it all over your app.
Guards solve this by moving access control out of controllers and into a reusable layer designed specifically for that purpose. Nest’s docs emphasize this declarative, DRY style as one of the reasons guards fit well into the request/response cycle.
That gives you:
- cleaner controllers
- more reusable auth logic
- better separation of concerns
- easier testing
All very good things.
Common Beginner Mistakes with Guards
Let’s prevent a few future headaches.
1. Mixing up authentication and authorization
These are connected, but not the same.
Authentication proves identity.
Authorization checks permissions.
2. Putting route permission logic in middleware
Nest’s docs explicitly explain why guards are better than middleware for authorization: guards know what handler is about to execute because they have ExecutionContext; middleware does not.
3. Doing access checks directly in controllers
You can do that, but it quickly becomes repetitive and messy.
Guards exist so you do not have to keep doing that manually.
4. Expecting guards to validate input
That is not their job.
Input validation belongs in pipes and DTOs, which run in a different part of the lifecycle.
5. Forgetting that guards run before the controller
If a guard blocks the request, the route handler never executes. That is the entire point.
A Good Mental Model to Remember
If you want one sentence to remember guards, use this:
Guards decide whether a request is allowed to reach the route handler.
And if you want the expanded version:
- middleware touches the request early
- guards decide access
- pipes validate input
- controllers handle the route
- interceptors wrap execution
- exception filters clean up errors
That mental model will take you pretty far.
Real-World Example Flow
Imagine this request:
GET /admin/reports
Authorization: Bearer some-jwt-token
The flow looks like this:
- request enters the app
- middleware may log it
- auth guard checks whether the JWT is valid
- if valid, Nest attaches user info and continues
- roles guard checks whether the user has
admin - if yes, the controller runs
- the route returns protected data
If the JWT is invalid, authentication fails.
If the user is authenticated but not an admin, authorization fails.
That is the distinction in action.
Why This Chapter Matters
Guards are one of the places where NestJS starts feeling really well designed.
They let you:
- protect routes cleanly
- separate access control from controllers
- build authentication and authorization in a reusable way
- keep permission logic close to the request lifecycle where it belongs
Once this idea clicks, your app structure usually gets much cleaner.
And that is exactly what we want.
Final Thoughts
Guards in NestJS are all about access control.
They implement CanActivate, they run before the controller, and they decide whether the request should be handled at all. Nest’s official docs define that as their single responsibility.
That makes them the perfect tool for:
- authentication
- authorization
- route protection
- role checks
- permission checks
The key thing to remember is this:
- authentication asks who the user is
- authorization asks what the user can do
And guards are where those decisions fit naturally in NestJS.
Now that you understand how NestJS decides whether a request is allowed, the next step is another pair of tools that beginners often mix up:
interceptors and exception filters
Because once a request is allowed through, you still need to handle responses and errors in a clean, reusable way.
Real Interview Questions
What is a guard in NestJS?
A guard is a class that implements CanActivate and decides whether a request should be handled by the route handler.
Are guards used for authentication or authorization?
Both. Guards are commonly used for authentication and authorization checks, though the two concepts are different: authentication proves identity, while authorization checks permissions.
Why are guards better than middleware for authorization?
Because guards have access to ExecutionContext and know what handler is about to run, while middleware does not. Nest’s docs explicitly highlight this difference.
Do guards run before the controller?
Yes. Guards run before the controller route handler in the Nest request lifecycle.
How does JWT auth usually work in NestJS?
The common flow is: authenticate with credentials, issue a JWT, send it back in the Authorization: Bearer <token> header on later requests, and use a guard to protect routes by validating that token.