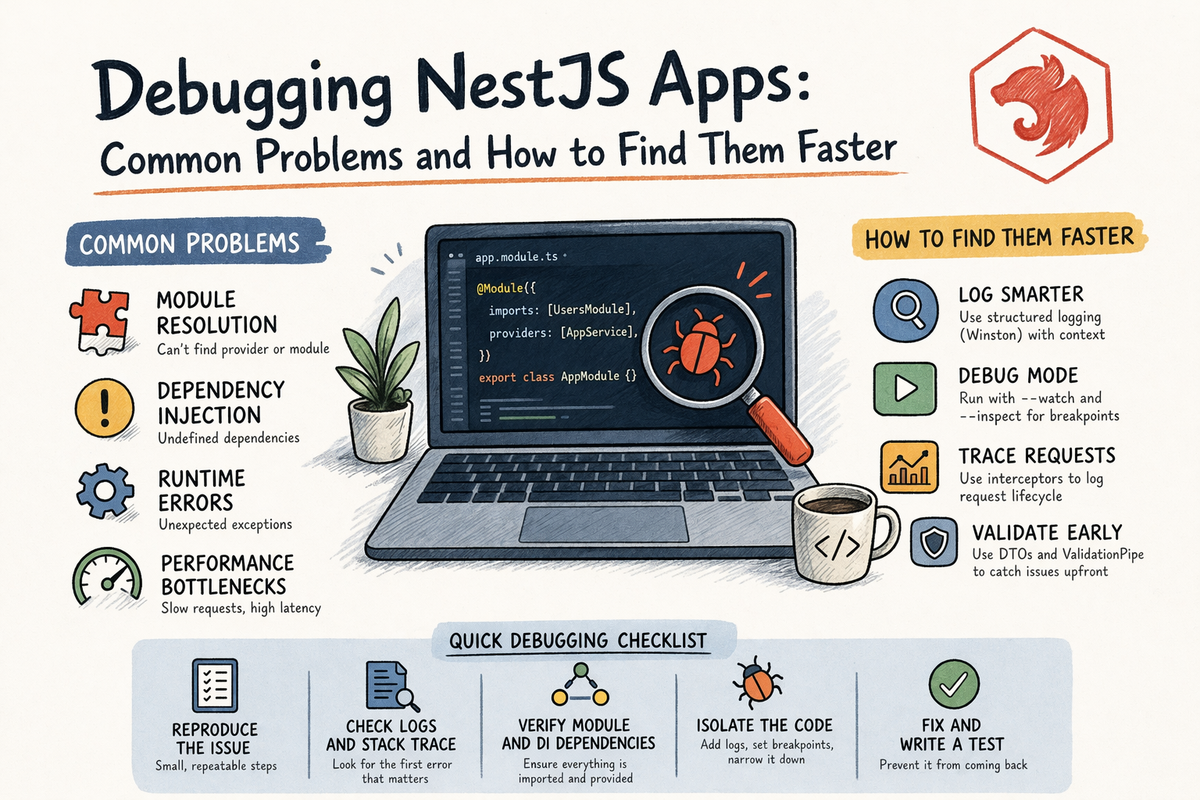
Debugging NestJS Apps: Common Problems and How to Find Them Faster
At some point in every NestJS project, you hit one of these moments:
- the app does not boot
- a provider cannot be resolved
- a route does not work
- your config values are mysteriously undefined
- watch mode starts acting possessed
- you stare at the terminal and the terminal gives you absolutely no emotional support
That is normal.
Writing code is one skill.
Debugging code is another.
And honestly, debugging is where a lot of real developer growth happens.
Because once your app gets bigger, the question stops being:
“Can I write this feature?”
and becomes:
“Can I figure out what broke, why it broke, and fix it without randomly changing ten files and hoping for a miracle?”
That is what this article is about.
By the end, you will understand:
- the most common NestJS debugging problems
- how to think about dependency injection errors
- how to find circular dependency problems faster
- how logging helps more than people think
- how config mistakes create weird bugs
- how to debug in a more systematic way instead of emotionally negotiating with your terminal
Let’s make debugging less chaotic.
Why Debugging Feels Different in NestJS
NestJS is structured.
That is a good thing.
But it also means when something breaks, the issue might be connected to:
- module wiring
- provider registration
- dependency injection
- route decorators
- guards
- pipes
- config loading
- app bootstrap
- imports and exports between modules
So a NestJS bug is not always:
“This line is wrong.”
Sometimes it is:
“This class exists, but not in the module context where Nest expects it.”
That is a different kind of debugging.
And once you understand the framework structure, debugging gets much easier.
The Best Debugging Habit: Stop Guessing Randomly
Before we get into specific errors, here is the most important debugging advice in the whole article:
do not debug by panic-editing random files
You know the move:
- comment something out
- add
any - remove a provider
- re-add a provider
- restart the app seven times
- blame TypeScript
- blame decorators
- blame the weather
Very relatable.
Usually not effective.
A better process is:
- read the full error carefully
- identify where in the app lifecycle it fails
- narrow the scope
- confirm one hypothesis at a time
- use logs and tooling on purpose
That sounds less dramatic.
Which is exactly why it works better.
The Most Common NestJS Error: “Cannot Resolve Dependency”
This is one of the most common NestJS errors you will see.
It usually looks something like:
Nest can't resolve dependencies of the <provider> (?).
Please make sure that the argument <unknown_token> at index [<index>] is available in the <module> context.
If you are new to Nest, this error can look a little rude.
But it is actually very informative once you know how to read it.
What It Usually Means
It usually means Nest is trying to create a provider, but one of its dependencies is not available in that module context.
That often happens because:
- the provider is not in the module’s
providersarray - the provider belongs to another module but was not exported
- the module containing that provider was not imported
- the provider was accidentally placed in
importsinstead ofproviders - the same provider was duplicated in the wrong places
- you injected something incorrectly
How to Debug It
When you see this error, check these things in order:
1. Is the missing provider in the providers array?
This is the most common issue.
2. Is it exported from its module if another module needs it?
If a provider lives in UsersModule, and AuthModule wants to use it, UsersModule usually needs to export it.
3. Is the providing module imported where needed?
Exporting alone is not enough.
The consuming module also has to import the module that exports it.
4. Did you accidentally put a provider in imports?
This happens more often than people admit.
Example
Bad:
@Module({
  imports: [UsersService],
})
export class AuthModule {}
Good:
@Module({
  providers: [UsersService],
})
export class AuthModule {}
A Very Common Beginner Pattern
You create:
UsersServiceUsersModule
Then in another module you inject UsersService, but forget to:
- export it from
UsersModule - import
UsersModuleinto the new module
Then Nest says it cannot resolve the dependency.
And technically, Nest is right.
Annoyingly right, but right.
When the Unknown Token Is Object
Sometimes the error mentions Object as the missing token.
That can happen when you are injecting:
- an interface
- a type
- something without a real provider token
Example mistake:
constructor(private readonly config: SomeInterface) {}
Nest cannot inject a TypeScript interface at runtime because interfaces do not exist at runtime.
How to Fix It
You usually need one of these:
- inject a concrete class
- use a custom token
- use
@Inject(TOKEN)with a real provider token
That is one of those problems that feels confusing until you remember that TypeScript types are mostly erased at runtime.
Then it makes much more sense.
Circular Dependencies: The Other Classic Problem
Another very common debugging issue is circular dependency trouble.
This often shows up when:
- module A imports module B
- module B imports module A
or:
- service A depends on service B
- service B depends on service A
That creates a cycle Nest has trouble resolving.
What the Error Can Look Like
You may see errors like:
- module in imports array is
undefined - Nest cannot create the module instance
- circular dependency hints
- dependency chain problems
A Sneaky Version: File-Level Circular Imports
This one is extra annoying.
Sometimes the circular problem is not even constructor injection.
It is just two TypeScript files importing each other.
For example:
- a module file exports a constant
- a service imports that constant
- the module imports the service
Now you have a file import loop.
This kind of issue is easy to miss because the code can look harmless at first.
What Helps
- reduce unnecessary cross-imports
- move shared constants into separate files
- watch out for barrel files creating hidden cycles
- use
forwardRef()only when you truly need it, not as a debugging superstition
The key point is this:
not every circular issue is a provider problem
sometimes it is just a file structure problem
That distinction saves time.
Use NEST_DEBUG When Dependency Resolution Gets Weird
One of the most useful built-in debugging aids in Nest is the NEST_DEBUG environment variable.
When enabled, Nest prints more information while resolving dependencies.
That gives you a better view of:
- which class is being resolved
- which dependency token is involved
- which module Nest is searching in
That is extremely helpful when DI errors get confusing.
Example
NEST_DEBUG=true npm run start:dev
This is especially useful when the normal error message is not enough and you need to trace the dependency resolution path more carefully.
Very underrated tool.
Nest Devtools Can Help More Than People Expect
If you are debugging structure-related issues, Nest Devtools can be genuinely useful.
It can help you explore:
- the application graph
- routes
- classes
- dependency relationships
And it is especially helpful for “Cannot resolve dependency” style problems.
Basic Devtools Setup
In main.ts:
async function bootstrap() {
  const app = await NestFactory.create(AppModule, {
    snapshot: true,
  });
  await app.listen(process.env.PORT ?? 3000);
}
Then install the integration package:
npm i @nestjs/devtools-integration
And in app.module.ts:
@Module({
  imports: [
    DevtoolsModule.register({
      http: process.env.NODE_ENV !== 'production',
    }),
  ],
})
export class AppModule {}
Why This Helps
Because when your app structure gets non-trivial, visualizing the module graph is often much faster than mentally reconstructing it from imports alone.
That is especially true for:
- new developers joining a project
- large apps
- debugging dependency issues
- understanding why something is not visible where you expected it to be
One important note:
do not use this in production
That is not the vibe.
When Routes Do Not Behave the Way You Expect
Sometimes the app starts fine, but the route still does something weird.
Examples:
- route returns 404
- route hits the wrong handler
- params are not parsed right
- guard blocks unexpectedly
- pipe throws before controller logic runs
- interceptor changes the response shape in surprising ways
When that happens, walk the request lifecycle in order.
Ask These Questions
1. Is the route path correct?
Check:
- controller prefix
- method decorator
- global prefix if you use one
- versioning if enabled
2. Is the request being blocked by a guard?
If the controller never runs, it may not be a controller issue at all.
3. Is a pipe rejecting the input?
Bad params and invalid DTO data can stop the request before the controller method really gets going.
4. Is an interceptor transforming the result?
Sometimes the raw service output is fine, but the response looks odd because an interceptor wrapped or mapped it.
5. Is an exception filter shaping the error response?
The real error may be deeper than what the final JSON response makes obvious.
This is why knowing the request lifecycle matters so much.
A lot of “controller bugs” are not actually controller bugs.
Logging Is One of the Best Debugging Tools You Already Have
People sometimes think logging is boring.
That usually lasts until the first bug where logs save them half an hour.
Nest has a built-in logger, and even the default logger is already useful during development.
Simple Logging Example
import { Injectable, Logger } from '@nestjs/common';

@Injectable()
export class PostsService {
  private readonly logger = new Logger(PostsService.name, {
    timestamp: true,
  });

  findAll() {
    this.logger.log('Fetching all posts');
    return [];
  }
}
This gives you:
- context
- timing
- easier flow tracing
Which is great for debugging.
What to Log
Good debug logging often includes:
- route entry points
- key IDs
- validation checkpoints
- auth decisions
- service method starts/finishes
- unusual branches
- unexpected failures
Not every line needs a log.
But important transitions absolutely help.
Custom Logger Setup
As your app grows, you may want a custom logger.
Nest supports custom loggers and even buffering early bootstrap logs with:
const app = await NestFactory.create(AppModule, {
  bufferLogs: true,
});

app.useLogger(new MyLogger());
That is especially helpful when you want more consistent logging behavior across the app.
Config Bugs Create Extremely Weird Problems
A lot of debugging pain is actually config pain.
Common examples:
process.env.PORTis undefined- DB URL is missing
- auth secret is wrong
.envfile is not loaded- environment-specific values are different than expected
These bugs often feel random at first because the app code can look perfectly fine.
Use ConfigModule Properly
A common clean setup is:
ConfigModule.forRoot({
  isGlobal: true,
});
Or with custom paths:
ConfigModule.forRoot({
  envFilePath: '.development.env',
});
You can also load multiple files:
ConfigModule.forRoot({
  envFilePath: ['.env.development.local', '.env.development'],
});
The first matching file in the list takes precedence.
Why This Matters for Debugging
If a value is missing, you want to know:
- was the env file loaded?
- are you reading the right variable name?
- is the variable coming from runtime env instead?
- is the module global or imported where needed?
Environment Variable Expansion
Nest config also supports expanded env values.
Example idea:
- one variable references another
SUPPORT_EMAILuses${APP_URL}style expansion
That only works if expandVariables: true is enabled.
That is one of those small config features that can save confusion when env-based values are chained.
The “File Change Detected” Endless Loop
This is a very specific but real debugging issue.
On some Windows setups, especially with newer TypeScript watch behavior, running:
npm run start:dev
can produce an endless loop like:
File change detected. Starting incremental compilation...
Found 0 errors. Watching for file changes.
again and again.
The Fix
Add this to tsconfig.json:
{
  "watchOptions": {
    "watchFile": "fixedPollingInterval"
  }
}
This tells TypeScript to use polling instead of the default file system event strategy that can misbehave on some machines.
If you ever hit this, it feels bizarre until you know it is a real known issue.
Then it becomes much less spooky.
How to Debug by Narrowing the Scope
One of the best general debugging techniques is scope reduction.
Instead of asking:
“Why is the app broken?”
ask:
- Is the app failing at bootstrap?
- Is the module failing to compile?
- Is the request reaching the controller?
- Is the service method being called?
- Is the failure only in one route?
- Is the issue config, DI, or request flow?
That process gives you a much cleaner path.
Example Debug Flow
Let’s say a route does not work.
You can narrow it down like this:
1. Does the app start?
If not, focus on bootstrap / module / provider errors.
2. Does the route get matched?
If not, check route path, prefix, and versioning.
3. Does the controller method run?
If not, check guards, pipes, and route decorators.
4. Does the service method run?
If not, check injection and controller wiring.
5. Does the service return what you expect?
If yes, maybe the interceptor or exception layer is changing the final output.
That is a much better debugging rhythm than randomly rewriting logic.
Testing and Debugging Work Very Well Together
A nice debugging trick is to use tests as a narrowing tool.
If you already have:
- a unit test for the service
- an e2e test for the route
then a bug becomes easier to isolate.
For example:
- if the unit test passes but e2e fails, the issue may be routing, guards, pipes, or app wiring
- if both fail, the logic itself may be broken
- if e2e passes but local UI usage fails, the issue may be client-side
So yes, testing helps prevent bugs.
But it also helps you localize bugs once they exist.
Very powerful combination.
Common Beginner Debugging Mistakes
Let’s save a few hours of future confusion.
1. Reading only the first line of the error
Nest errors often contain the actual hint a few lines later.
Read the whole thing.
2. Blaming the wrong layer
A controller problem might really be:
- a guard problem
- a pipe problem
- a provider registration problem
- a config problem
3. Ignoring module boundaries
If a provider is not visible in the right module, the app may fail in ways that feel unrelated at first.
4. Logging too little
No logs means less visibility.
That makes debugging slower.
5. Logging everything without structure
Too many noisy logs can also be a mess.
Use logs intentionally.
6. Treating forwardRef() like a magic bug spray
Sometimes you really need it.
Sometimes it just hides a design problem for a while.
Use it carefully.
7. Not checking config early
Missing env values create a shocking number of fake “framework problems.”
A Good Debugging Checklist
When something breaks in NestJS, check this list:
Structure
- is the module imported correctly?
- is the provider registered correctly?
- is it exported if needed elsewhere?
Injection
- does the dependency exist in the right module context?
- are you injecting a real runtime token?
- is there a circular dependency?
Request Flow
- does the request hit the route?
- is a guard blocking it?
- is a pipe rejecting it?
- is an interceptor changing the response?
Config
- is the
.envfile loading? - is the variable name correct?
- is
ConfigModuleset up properly? - are expanded variables enabled if needed?
Tooling
- should you enable
NEST_DEBUG? - would Devtools help here?
- do you need more targeted logging?
That checklist already solves a surprising amount of debugging pain.
A Good Mental Model to Remember
Here is the simplest useful debugging model for NestJS:
- boot error → think modules, providers, config
- route error → think lifecycle: guards, pipes, controller, interceptor
- weird data → think DTOs, parsing, transformation, response mapping
- missing dependency → think provider registration, exports, imports, tokens
- strange environment behavior → think config loading and env values
That mental map makes debugging much faster.
Final Thoughts
Debugging NestJS gets much easier once you stop treating bugs like random chaos and start treating them like structure problems with clues.
A lot of Nest issues fall into repeatable categories:
- dependency resolution
- module visibility
- circular imports
- request lifecycle placement
- configuration mistakes
- logging visibility
- watch-mode/tooling issues
Once you learn those patterns, the framework becomes much easier to reason about.
And that is the real upgrade.
Not “I never get bugs.”
More like:
“When bugs happen, I know how to corner them faster.”
That is a much more realistic and much more valuable skill.
Now that you know how to build, test, and debug NestJS applications, the next big step is understanding what happens when your app starts getting bigger:
Because once a project grows, debugging is only half the story.
The other half is designing the app in a way that breaks less painfully in the first place.
Real Interview Questions
How do I debug “Nest can't resolve dependencies” errors?
Check whether the provider is in the correct module’s providers array, whether it is exported if needed, whether the module is imported where needed, and whether you are injecting the right token.
What does NEST_DEBUG=true do in NestJS?
It enables extra dependency resolution logging, which helps trace how Nest is trying to resolve injected dependencies.
How can Nest Devtools help with debugging?
It helps visualize the application graph, routes, and class relationships, which is especially useful for dependency and module debugging.
Suggested Internal Links for CodeWithZiye.com
- How to Test NestJS Applications: Unit, Integration, and e2e
- When a NestJS App Starts Growing: Scalable Architecture Basics
- Why Dependency Injection Makes NestJS Feel So Clean
- NestJS Request Lifecycle: What Happens Before and After Your Controller